

SGP30のCO2の値が正しいのか知りたい
以前の実験で、SGP30センサで測定したCO2の値が、TVOCの値に影響されているようで、正しい値なのか疑問を持ちました。
そこで、以前mbedで実験したCO2専用のセンサMH-Z19を使って、CO2を測定する環境を用意しようと思います。
MH-Z19 CO2センサ

MH-Z19はNDIRという赤外線分光を使ったガス検出センサです。ガスの中を通った光は、そのガス固有の特定の波長の光だけが大きく減衰します。この原理を利用したセンサです。
センサの仕組みはこうです。光を発生するライトと、測定したいガス(例えばCO2)固有の特定の波長のみに感度がある光センサを用意して、ライトとセンサの間にガスを通します。通したガスが特定のガス(例えばCO2)の場合だけ、光センサが受光する光の量が減少します。この、「特定の波長の光がどれだけ減衰したか」から特定のガス(例えばCO2)の濃度が測定できるというわけです。この方式のセンサは、簡単な仕組みの割には、特定のガスのみを比較的精度よく測定できるのが特徴です。
ということで、この原理を利用したMH-Z19は、原理的にはそれなりに性能が高いので、このセンサでCO2を測定して、SPG30の測定結果と比較しようと思います。

プログラムを作る
MH-Z19はArduinoのライブラリがあったのですが、私のセンサではうまく測定値が得られませんでした。そこで、データシートを見ながら自分でプログラムを作りました。
測定プログラム
M5SticKCのG0とG26でMH-Z19センサとシリアル通信します。作ったプログラムがこちら。
#include <M5StickC.h>

//MHZ19センサ用
unsigned long getDataTimer = 0; //時間保持用
const unsigned long getDataPeriod = 1000; //測定周期[ms]
int CO2 = 400;
int temperature = 20;

//画面の明るさ
bool lcdOn = false;

void setup() {
  M5.begin();
  M5.Lcd.fillScreen(BLACK);
  M5.Lcd.setRotation(0);

  //MH-Z19用シリアル
  Serial1.begin(9600, SERIAL_8N1, 0, 26);

  //デバッグ用シリアル
  Serial.begin(115200);
  Serial.println("MH-Z19 test");

  //測定レンジ変更
  setDetectionDange(5000);
}

void loop() {
  M5.update();

  //Aボタンを押すと、画面の明るさをON,OFFする
  if( M5.BtnA.pressedFor(1) ){
    if( lcdOn == true )
    {
      lcdOn = false;
      M5.Axp.ScreenBreath( 0 );
    }
    else
    {
      lcdOn = true;
      M5.Axp.ScreenBreath( 15 );
    }
  }

  //Bボタンを押すと、キャリブレーション
  if( M5.BtnB.pressedFor(1000) ){
    setZeropoint();
    Serial.println(" calibrated");
    delay( 4000 );
  }

  //測定
  if( getGasConcentration( &CO2 , &temperature ) )
  {
    Serial.println("CO2[ppm]: " + String(CO2) + "\tTemperature['C]: " + String(temperature));
  }

  //測定結果の表示
  int yLocation = 0;
  M5.Lcd.setCursor(0, yLocation, 2);
  M5.Lcd.println("CO2"); yLocation+=16;
  String str = "      " + (String)CO2;
  M5.Lcd.drawRightString(str, M5.Lcd.width(), yLocation,4); yLocation+=24;
  M5.Lcd.drawRightString("[ppm] ", M5.Lcd.width(), yLocation,2); yLocation+=16;

  yLocation+=8;
  M5.Lcd.setCursor(0, yLocation , 2);
  M5.Lcd.println("Temperature"); yLocation+=16;
  str = "      " + (String)(temperature);
  M5.Lcd.drawRightString(str, M5.Lcd.width(), yLocation,4); yLocation+=24;
  M5.Lcd.drawRightString("['C] ", M5.Lcd.width(), yLocation,2); yLocation+=16;

  delay(1000);

}

/*--- MH-Z19用 ---*/
#define MHZ19_DATA_LEN 9

//CO2,温度を取得する
bool getGasConcentration(int *CO2 , int *temperature )
{
  byte command[MHZ19_DATA_LEN] = {0xff,0x01,0x86,0x00,0x00,0x00,0x00,0x00,0x79};
  sendCommand( command , sizeof(command) );

  byte response[MHZ19_DATA_LEN];
  recieveResponse( response );


  //コマンドチェック
  if( response[1] != 0x86 )
  {
    Serial.printf("Response Error '%x'\n",response[1]);
    return false; //timeOut
  }

  int CO2Temp = (int)response[2] * 256 + (int)response[3];
  int temperatureTemp = (int)response[4] -40;

  *CO2 = CO2Temp;
  *temperature = temperatureTemp;

  return true;
}

//ゼロポイントキャリブレーション
bool setZeropoint()
{
  byte command[9] = {0xff,0x01,0x87,0x00,0x00,0x00,0x00,0x00,0x78};
  sendCommand( command , sizeof(command) );

  byte response[MHZ19_DATA_LEN];
  recieveResponse( response );

  //コマンドチェック
  if( response[1] != 0x87 )
  {
    Serial.printf("Response Error '%x'\n",response[1]);
    Serial.printf("reaponse %x %x %x %x %x %x %x %x %x\n", response[0], response[1], response[2], response[3], response[4], response[5], response[6], response[7], response[8]);
    return false; //timeOut
  }

  return true;

}

//測定レンジ変更
bool setDetectionDange(int range)
{
  if( range != 2000 && range != 5000 )
  {
     Serial.printf("invalid range. Please set 2000 or 5000 \n");
     return false;
  }

  byte command[9] = {0xff,0x01,0x99,0x00,0x00,0x00,0x00,0x00,0x00};
  command[3] = (byte)(range/256);
  command[4] = (byte)(range%256);
  command[8] = calcCheckSum(command);

  sendCommand( command , sizeof(command) );

  byte response[MHZ19_DATA_LEN];
  recieveResponse( response );

  //コマンドチェック
  if( response[1] != 0x99 )
  {
    Serial.printf("Response Error '%x'\n",response[1]);
    Serial.printf("reaponse %x %x %x %x %x %x %x %x %x\n", response[0], response[1], response[2], response[3], response[4], response[5], response[6], response[7], response[8]);
    return false; //timeOut
  }

  return true;

}


//コマンドの送信
void sendCommand(byte command[], int length)
{
  //Serial.printf("command %x %x %x %x %x %x %x %x %x\n", command[0], command[1], command[2], command[3], command[4], command[5], command[6], command[7], command[8]);
  for( int i=0 ; i<length ; i++ )
    Serial1.write(command[i]);
}

//チェックサムの計算
byte calcCheckSum( byte data[] )
{
  byte checkSum = 0;

  for (int x = 1; x<MHZ19_DATA_LEN-1; x++)
  {
    checkSum += data[x];
  }
  checkSum = 255 - checkSum;
  checkSum++;

  return checkSum;
}

//センサから応答を受信する
bool recieveResponse( byte response[] )
{
  unsigned long timeStamp = millis();

  //返答の先頭の0xFFが来るのを待つ
  while(1){
    if( Serial1.available() )
    {
      byte res;
      Serial1.readBytes(&res, 1);
      if( res == 0xff )
        break;
    }
    if (millis() - timeStamp >= 2000)
    {
      Serial.println("0xFF wait Time Out");
      return false; //timeOut
    }

    //millisがオーバーフローしたらgetDataTimerをリセット
    if( timeStamp > millis() )
      timeStamp = millis();

  }

  //8バイトたまるのを待つ
  timeStamp = millis();
  while (Serial1.available() < MHZ19_DATA_LEN-1)
  {
    if (millis() - timeStamp >= 2000)
    {
      Serial.println("Recieve Time Out");
      return false; //timeOut
    }

    //millisがオーバーフローしたらgetDataTimerをリセット
    if( timeStamp > millis() )
      timeStamp = millis();
  }

  //データの読み出し
  response[0] = 0xff;
  Serial1.readBytes(&(response[1]), MHZ19_DATA_LEN-1);
  //Serial.printf("reaponse %x %x %x %x %x %x %x %x %x\n", response[0], response[1], response[2], response[3], response[4], response[5], response[6], response[7], response[8]);

  //チェックサムチェック
  if( response[8] != calcCheckSum( response ) )
  {
    Serial.printf("Check Sum Error read'%x' correct'%x'\n", response[8], calcCheckSum(response ) );
    Serial.printf("reaponse %x %x %x %x %x %x %x %x %x\n", response[0], response[1], response[2], response[3], response[4], response[5], response[6], response[7], response[8]);
    return false;
  }
  return true;
}
測定値を得るコマンドと、ゼロキャリブレーション、レンジ変更コマンドだけを実装しました。
Aボタンを長押しすると表示のON,OFFができ、Bボタンを長押しでゼロキャリブレーションできます。
1秒ごとに、CO2とセンサ温度を液晶画面に表示してくれます。

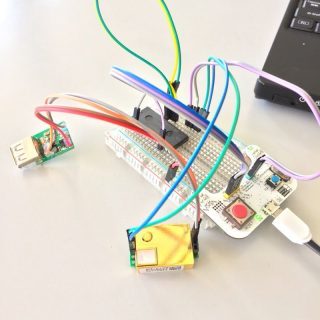
センサのTXとM5StickCのG0の間には、220Ωの抵抗を接続します。これがないと、プログラムの書き込みができませんでした。
いい感じに、CO2が測定できています。SPG30よりも値がぶれずに安定して測定できているような気がします。
MH-Z19 HATを作る
無事動くようになったので、HATにします。といっても、ピンヘッダと、センサをつなぐだけです。

ポイントとしては、センサのTxとG0との間に220Ωの抵抗を挟むということです。これがないと、プログラムを書き込むことができません。これ以上大きな値だと、今度は通信がうまくいきません。220Ωがちょうどいいようです。
あとM5StickCは5V出力があるので、5Vのセンサが接続できて便利ですね。
配線が終わったらショートしないように、ポリイミドテープを貼って絶縁しておきます。
M5StickC用 MH-Z19 HATの出来上がり。
さて、単体で測定できるようになったので、次回はSGP30の時のようにambientに送信して記録できるようにしたいと思います。


コメント